Previously I was producing Ruby on Rails projects using an online(cloud) based development IDE and environment. This was done using AWS Cloud 9 and launching the production application in Heroku. I was keen to learn how I could:
- Setup a Linux machine
- Pull my existing projects across onto the Linux machine
- Setup the Linux machine and environment for building and deploying these projects.
Linux Administration
I have many years of Unix experience, but mostly at the application level. I have very little systems level experience. Almost all my Unix experience has been with the SCO operating system – which is not a Linux derivative. As part of enhancing my Linux knowledge I completed a Udemy course on Linux Administration.
This was a bootcamp type course that went through the most popular flavours of Linux. From this course and my previous interest in my current full-time role I was interested in installing Centos Linux. Centos is a Red Hat version of Linux – with Red Hat being the paid for and fully supported version, and Centos being the FREE version. The current version of Centos is 7.
A large proportion of the course focused on command line operations, of which most I was very familiar with already. I gained the most knowledge around systems setup and using the package management. Parts of the course relating to the Boot process and Systems setup was also interesting.
Virtual Box
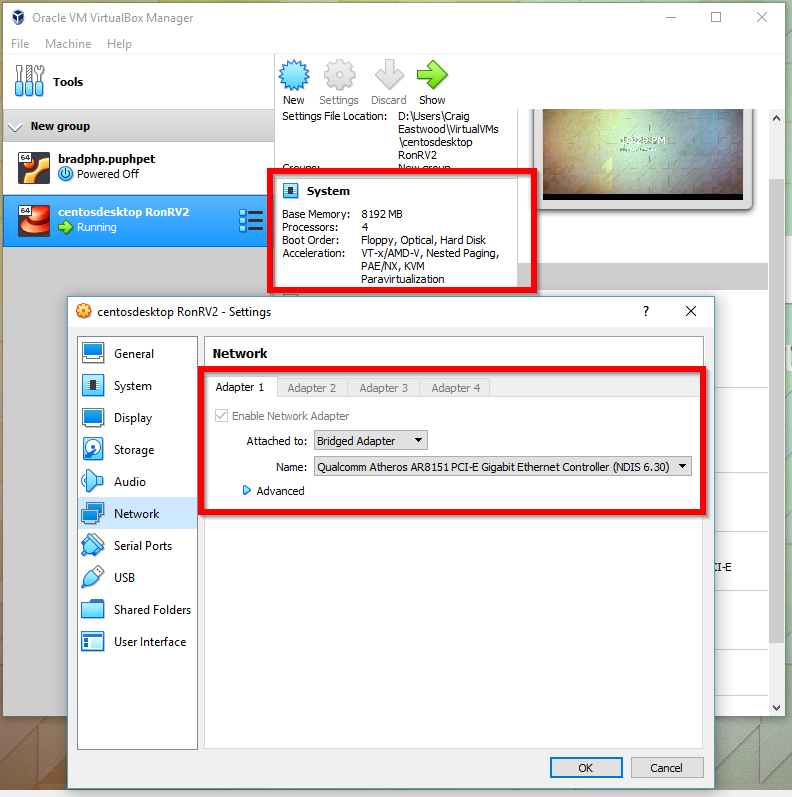
As I am running a Windows 10 PC, I decided that I would setup Linux as a virtual machine using Oracle Virtual Box. This is relatively straight forward to do. Once installed I used a Centos VDI (Virtual Disk Image) that was supplied by the course. It then just a matter for setting up a NEW system and referring to the Centos VDI. The basic configuration in Virtual Box should be:
- Setup the Network Adapter 1 as a “Bridged Adapter”
- 8 GB Ram
- Set the correct timezone in Linux
Centos – Ruby on Rails Environment
Once the basic Linux machine is setup and booting OK, then you can start to setup the development environment. The package manager/installer on Centos is called “yum”. You will need to use “yum” to install the packages needed for the development environment. You will most likely need root access to install most of what you need.
I must say I cannot remember exactly all the steps, but here is what I can remember:
- Install and Configure “Git”
- Use Guide for Installing Rails 5 on Centos 7 to install the following:
- “rbenv” with “ruby” and “gem”
- “bundler” using “gem”
- “Rails 5” using “gem”
As I wanted to try to build my existing “Recipe” application, it was using a previous version of “ruby” (version 2.4.6). As a result, I had to install a previous version which proved a little problematic. You need to use the “rbenv” tool to assist with this
Recipe Application Setup
After setting up the Centos Linux environment I managed to clone my Recipe repository from Github. After the clone you need to perform a “bundle install”. You can then run the rails server by running “rails server”; this will default to running on “localhost:3000”.
Initially I had some issues with trying to access the Linux Rails Server from my host Windows 10 PC. This is where I needed to setup my network on the Linux VM as “Bridged Adapter”. You can then run the command “ifconfig” to discover what local IP address is:
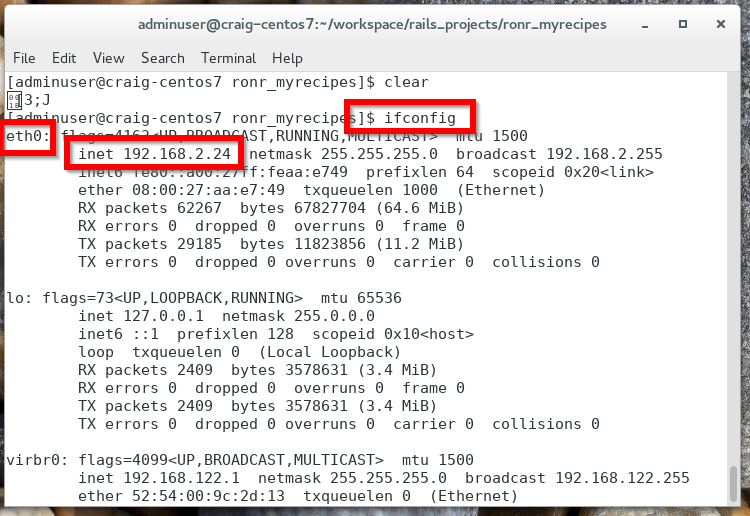
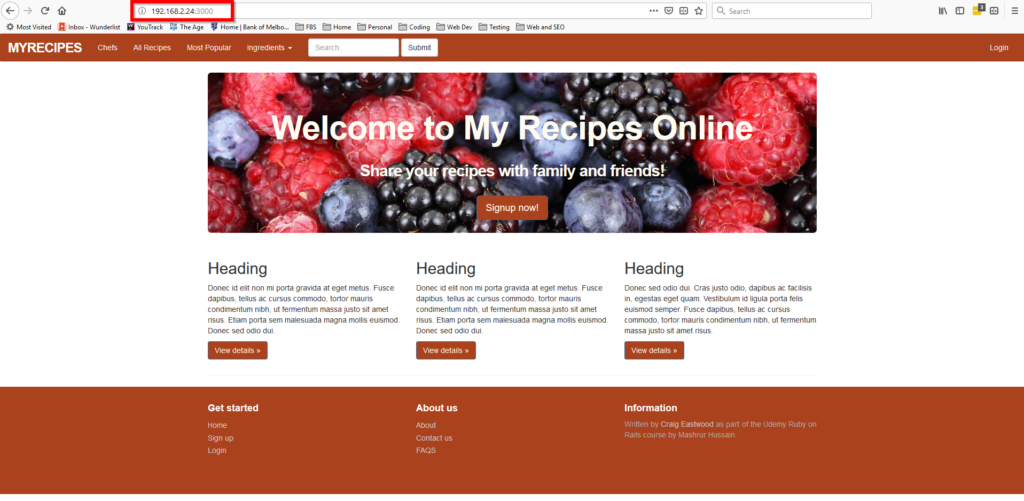
When you start the rails server you can specify the exact IP and port name. ie. rails server -b 192.168.2.24 -p 3000
You can then access the application on this address:
Ubuntu for Windows
It was only after performing all the above setup that I discovered a significantly easier way to work with Ruby on Rails development from my Windows 10 PC.
For Windows 10 you can install the “Ubuntu for Windows” application. This behaves a little like the old Cygwin you used to be able to run Linux commands on Windows. To install you just follow the steps from the Windows App store. Once installed you will need to install the same packages as mentioned above for Ruby, Rails, Bundler, etc. The difference here is the package manager is “apt-get” and not “yum”.
One of the key advantages with using Ubuntu for Windows is that it starts up with Windows and hence when you open a session from Windows it is instantaneous. You do not need to startup a separate VM for Linux as above. It also feels like it runs significantly faster.
When running the Rails server for your particular application there is not need to specify a port number, and hence you can run the application from your browser at “localhost:3000”.
You also have access to your local PC drives, and hence this can make life easier for keeping your development projects together and performing local backups, etc.
Alpha Blog
It is within this Ubuntu Linux development environment that I produced my next project with Rails 5 and Styled with Bootstrap 4 – A Small Blogging site called Alpha Blog.
My skills have improved a little further with this project and I was even able to assist of few of the students in the course. The majority of my time spent in this project was getting the styling and mobile responsiveness correct.
I will continue with this Ruby and Rails course and post my future projects soon (hopefully).